How To Scan Your Pictures And Get The Best Photo Quality For Your Slideshow

Ready to start your project?
Get started

A picture is worth a thousand words. It’s a total cliché but what it means is this: A picture tells a story. One photo can convey expression, emotion, character. It can bring a flood of memories and affect other sensors such as smell and taste. A picture is powerful.

When photos are combined with music and movement, the emotional impact becomes even more powerful than the music or the image alone. That’s what a slideshow does.

If you are in the beginning stages of gathering your photos, this is the time to be thinking about the quality of your pictures. I’m not talking about if the photo is a little blurry or the subject is out of focus. I’m not even referring to red-eye or uneven framing. I am talking about pixels.

If your photos are already in a digital format (preferably jpg or png), you probably don’t need to worry about pixelation problems. Unless of course you took a screenshot of a thumbnail on Facebook. Then we might have some clarity issues. That’s a biggie. We’ll go over that in a new post.

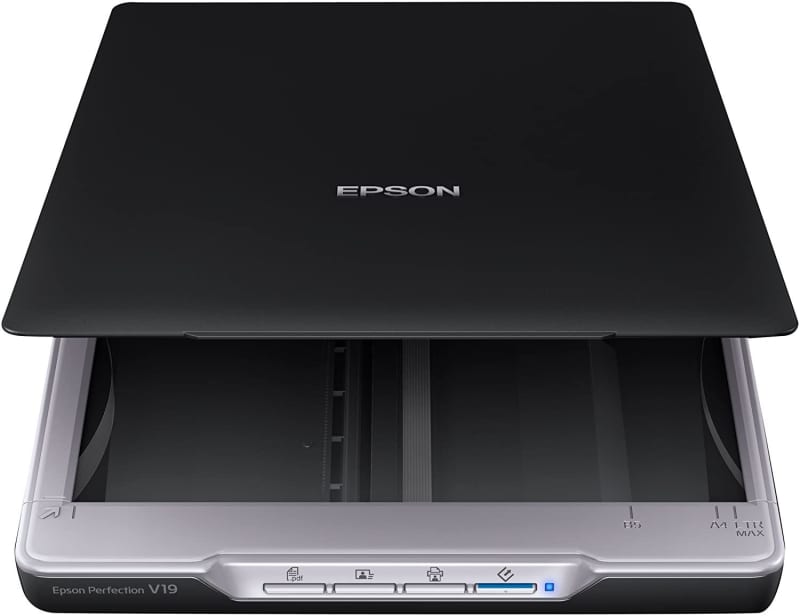
Purchasing a scanner

Scanning your photos can easily be done at home and there is no reason to go and buy an expensive scanner for your slideshow. You can get a quality scanner from Amazon for around $70 such as the Epson Perfection V19 Color Photo & Document Scanner or the Canon CanoScan Lide 300 Scanner. Both are inexpensive good quality flatbed scanners.

Epson Perfection V19 Color Photo & Document Scanner

Epson Perfection V19 Color Photo & Document Scanner

  • 4800 dpi optical resolution
  • Scan and share on cloud services
  • Epson Easy Photo Scan software
  • Fast speeds
  • Easy-to-use buttons
  • USB powered

Buy on Amazon

Canon CanoScan Lide 300 Scanner

Canon CanoScan Lide 300 Scanner

  • Fast scanning up to 10 seconds
  • 2400 x 2400 dpi resolution
  • Fade correction and dust reduction
  • Auto scan mode
  • Built in PDF button

Buy on Amazon

Here at Milestone Slideshows, we prefer the All-In-One printer/scanners because they take up less space and photos can be fed or placed scanned on the glass. Our current model is the Canon MX922. It’s more expensive at $399, but it has a lot of features such as Cloud and Mobile printing. You can even print your own DVDs if you’re still into that.

Canon MX922 All-In-One Printer/Scanner

Canon MX922 All-In-One Printer/Scanner

  • Wireless LAN
  • AirPrint
  • Google Cloud Print
  • Wireless Printing
  • Mobile Device Printing
  • CD/DVD Direct Printing
  • USB 2.0 Hi Speed

Buy on Amazon

You don't have to buy a scanner, but they do come in handy. And if your family is like mine, there is a cardboard box in the attic that is dying to be sorted and scanned.

If you don't want the added expense of purchasing a scanner, you can take your photos to a nearby Walgreens, Walmart, Sam's Club, or Costco. Many of these places have photo kiosks where you can scan your photos and save them on a flash drive or DVD. Some kiosks even offer uploading them to your Dropbox, Google Drive, or iCloud.

Scanner settings

Now that you have your scanner, let’s talk about your settings.

Scanner resolution

When scanning your photos, size and quality of the photo go hand in hand. It’s mostly about the dpi or “dots per inch.” The “dots” are the pixels and the higher the number, the more information. The more information, the better the image quality.

DPI can range from 75dpi into the thousands. Now, you could scan your photos at 4800dpi and that would be a high quality photo. But for your slideshow, it is not necessary. We have done a lot of experimenting and we have found that the perfect dpi for images for our slideshows is 300dpi. Because of the motion of the effects and transitions and that most displays are 4K or less, we simply do not need all that information.

Clear images are best. Again, I’m not talking about blurry photos. Pixelation is the issue. Take a look at these 2 images.

Photo scanned at 75dpi, Resolution 65x37

Photo scanned at 75dpi Resolution 65x37

Photo scanned at 300dpi, Resolution 1920x1080

Photo scanned at 300dpi Resolution 1920x1080

The image on the right is obviously far superior to the pixelated photo on the left. The picture on the right was scanned at 300 dpi and is large enough for us to apply zooming and panning effects without the image becoming pixelated. And the crowd goes wild!

Cropping your photos

When scanning your pictures, make sure your edges are straight and they are cropped correctly. We can make some corrections if there is a small rim of white around part of an image but if the photo is scanned with a rotation, some of that photo may not appear in your slideshow.

Take a look at these 2 images. The 1st photo was placed crooked on the scanner. The 2nd picture represents the crooked photo after it was cropped.

Rotated photo
Rotated photo

Rotated

Rotated and cropped photo

Rotated & cropped

Now, let’s see the original, perfectly cropped and scanned photo compared to the picture that was scanned with a rotation and cropped.

Original photo
Original photo

Original

Crooked and cropped photo

Crooked & cropped

You can see that some of the photo is missing and it is slightly turned. Thus, it is important to make sure your photos are placed neatly on your scanner so your entire photo is in your video.

Clean your glass

Your settings are set. Your photos are great quality and they are ready to tell their story. Make sure your pictures stay looking great by cleaning your scanner. Smudges and dust particles can build in minutes. Make sure you clean your flatbed scanner’s glass before beginning your project.

Start scanning

Now you are all set to begin scanning your images. If working on a large project, I recommend you set your scanner to place your saved digital photos in their own folder. You can set your scanner up to name your scans with a prefix that your scanner automatically labels each photo. Your pictures can be auto saved in a specific folder and labelled “My-project-scans-001.jpg,” “My-project-scans-002.jpg,” “My-project-scans-003.jpg,” etc. It’s a great way to keep organized.

Once you have all of your photos on your computer, it’s as easy as dragging and dropping them into your slideshow project on our website. From your dashboard, you can arrange your photos and video clips in order and we’ll take it from there!

Ready to dive in? Start your slideshow for free today.

Creating your next amazing slideshow is just a few clicks away. We can't wait to work with you.

Sign up for free
Screenshot of Milestone Slideshows app