What To Know About Cropping Photos Like a Pro
You snap a picture that captures a perfect moment. The lighting looks great, and the subject smiles brightly. You look at the result, but something feels slightly off. Maybe a stranger walked into the frame's edge, or the horizon tilts just enough to distract you. You do not need to delete the image or act like a professional photographer to fix it. You just need to understand the power of cropping.
What you should know about cropping is that it's one of the most effective ways to transform a good image into a great one. It allows you to remove unwanted details, change the focus, and completely alter the story your image tells. You take control of the composition after the fact. While it sounds technical, the process is actually quite simple. You do not need expensive software. Most phones and basic computer programs offer robust cropping tools. By learning a few key principles, you can elevate your photography instantly.
How Cropping Changes The Photo's Story
Every image tells a story. When you take a photo, you decide what to include in that story. Sometimes, you include too much information. A wide shot of a child playing in the park might show the playground, the trees, and the parking lot. If you crop that image to focus solely on the child's expression, the story changes. It becomes about joy and play rather than just a day at the park.
Cropping acts as a second chance at composition. You direct the viewer's eye exactly where you want it to go. You eliminate the noise and clutter that dilute your message. Think about what matters most in the frame. If an element does not add to the story, crop it out. You clarify your message with every pixel you remove.
Why The Rule of Thirds Matters
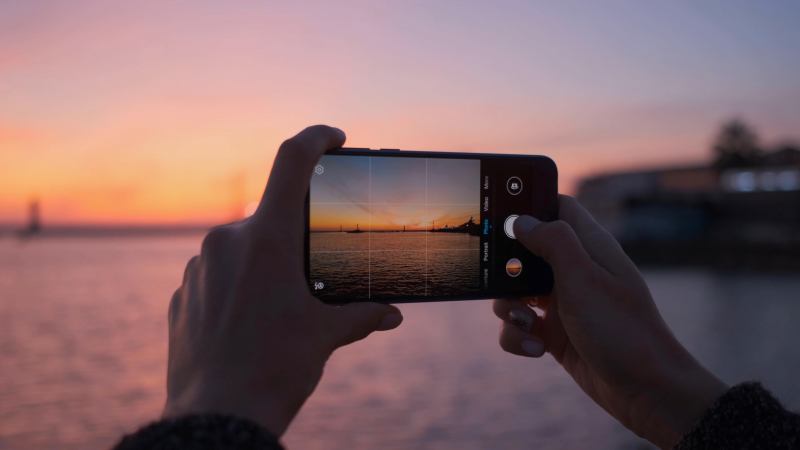
You will often hear photographers talk about the Rule of Thirds. This guideline helps you balance your image. Imagine a grid over your photo with two vertical lines and two horizontal lines. This grid creates nine equal sections. Many cameras and editing apps allow you to overlay this grid on your screen.
Place your main subject along these lines or at the points where they intersect. Doing so creates more energy and interest than simply centering the subject. If you take a portrait, place the subject's eyes on the top horizontal line. If you shoot a landscape, align the horizon with the top or bottom horizontal line. When you crop, you move the image around under this grid until the composition feels balanced.
When To Straighten The Horizon Line
Nothing ruins a beautiful landscape shot faster than a crooked horizon. It makes the viewer feel like they are sliding off the edge of the photo. Before you commit to a final crop, check your lines. Most cropping tools include a rotation wheel or a straighten slider.
Look for a straight line in the image to use as a reference. This could act as the horizon where the sky meets the sea, the line of a building, or a table's edge. Rotate the image until that line runs perfectly horizontal or vertical. As you rotate, the software will automatically crop the edges to keep the photo rectangular. This simple step makes your images look polished and intentional immediately.
How To Use Different Aspect Ratios
Aspect ratio refers to the relationship between the width and height of your image. Your camera shoots in a specific ratio, usually 4:3 or 3:2, but you do not have to keep it that way. Changing the aspect ratio dramatically affects how people perceive the photo.
A square crop (1:1) works perfectly for social media and focuses attention on the center. A panoramic crop (16:9) looks cinematic and suits wide landscapes. You must consider where you plan to display the final image. For instance, if you plan to create a sentimental video for a family event, such as an anniversary photo slideshow, you will likely want to crop your images to a horizontal 16:9 ratio to fill the TV screen without black bars.
Why You Must Watch Your Resolution
Cropping involves cutting away pixels. When you remove pixels, the remaining image becomes smaller in file size and resolution. If you crop too heavily, you might lose the sharpness and detail that made the photo good in the first place. A tiny crop from a large photo might look pixelated or blurry when you try to print it or display it on a large screen.
Always keep the final use in mind. If you only need the image for a small social media icon, you can crop significantly. If you want to print an 8x10 portrait, you need to retain more of the original data. Start with the highest resolution possible. If you notice the image becoming grainy as you zoom in to crop, you likely went too far. Pull back to keep the quality high.
When To Remove Distracting Elements
Background clutter steals attention from your subject. A bright red trash can in a wedding photo or a random street sign in a nature shot pulls the eye away from the focal point. You can often solve this problem by tightening your crop.
Check the edges of your frame before you save. Look for:
- Floating hands or partial limbs from people standing nearby
- Bright spots of light or color
- Text or signs that viewers might try to read
- Telephone wires or power lines
If you can cut these out without losing the main subject, do it. Your subject will pop, and the image will feel cleaner.
How To Leave Breathing Room
While removing distractions helps, you must also be careful not to cramp your subject. Your subject needs "breathing room," or negative space. If you crop too tightly around a person's face, the image might feel claustrophobic or intense.
Leave some space in the direction the subject looks or moves. If a runner moves toward the right side of the frame, leave open space on the right. This allows the viewer to imagine the movement continuing. If a person looks to the left, leave space on the left. This adds balance and context. It feels more natural to the human eye.
How To Position The Eyes
In portrait photography, the eyes hold the most importance. Viewers naturally look at eyes first. When you crop a photo of a person, pay close attention to where their eyes fall in the frame.
Avoid placing the eyes dead center unless you want a very specific, symmetrical look. Usually, placing the eyes one-third of the way down from the top of the frame looks best. This connects back to the Rule of Thirds. Also, ensure you do not crop through awkward joints. Avoid cutting the image off exactly at the neck, elbows, or knees. Crop at the mid-thigh, mid-chest, or mid-shin instead for a more flattering result.
Start Improving Your Photos Today
You have the tools and the knowledge to start cropping your photos like a pro. Open your photo gallery and pick an image that has potential but needs a little help. Try applying the Rule of Thirds. Straighten that horizon. Cut out the clutter. You will see an immediate difference in the quality of your images. Photography becomes much more fun when you realize you can fix and enhance your shots with just a few simple adjustments. Once you've mastered cropping, you can enhance your photos further and use them to create beautiful slideshows for special occasions.